I’ve finally got myself an airbrush and an air compressor. Actually I got it quite some time ago, even before I build my own spray booth. You can see the spray booth here. I just only recently started airbrushing.
To start things off I thought I use a cheap and simple kit as an experiment. After all, this is my first airbrush project and I don’t want to screw up a master grade of something like that. So the genie pig for this experimentation is… … … a HGUC 1/144 Gogg that I got for RM20 at the 2006 Malaysia BAKUC. You can see the BAKUC coverage in this post.
Below is a simple WIP for this project.
Pictures of snap fit Gogg.
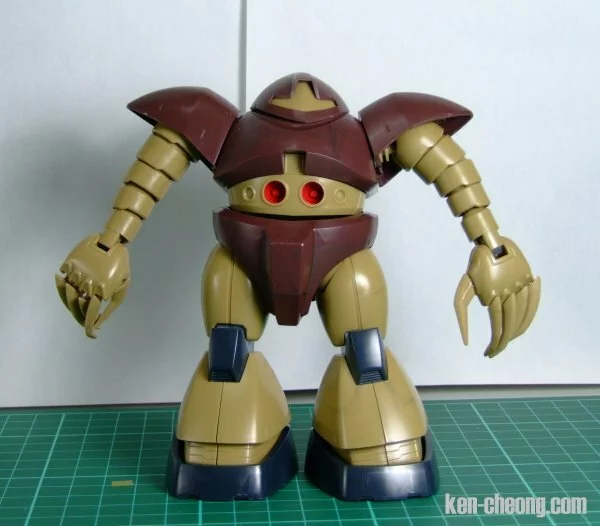
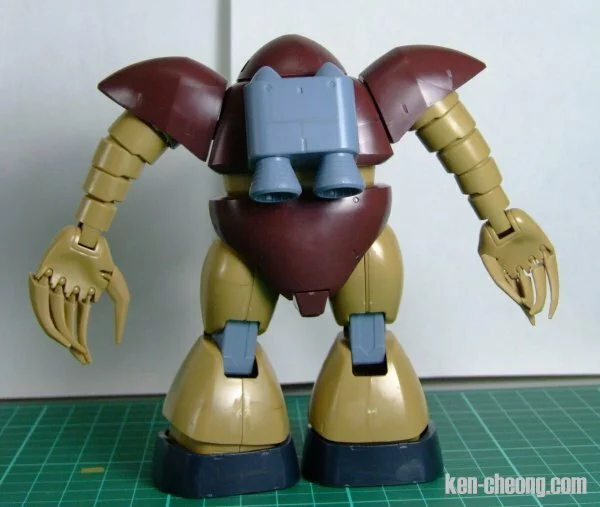
The body, shoulders, legs, and almost every part of the Gogg is pretty dull and uninteresting. I thought I make it more interesting my adding a few panel lines to it. I use masking tape to mark out the lines for scripting panel lines and use a homemade scriber to script the lines.

The scriber was made by inserting a suitable size needle into an old mechanical pencil. I learned this from the Dengeki magazine.
(more…)
Written by Ken on January 28th, 2007 with no comments.
Read more articles on Blog and Model Kit.
This is my entry for an out-of-box (OOB) competition organized by an online forum called Plamo. This competition is only open to MG Gundam kits featured in the One Year War era.
My entry is the MG Gundam RX78 CA. I got this kit couple of months ago but never get to build it until now. I thought this would be a great opportunity to build this kit and the competition would serves as a motivation for me to build it the best I can.
By the way, did I mentioned that this is the first ever MG kit I’ve ever built? I’m not sure how well can I cope with it. Lets wait and see how things turn out.
This post will be updated from time to time as I progress with the building of this kit so please check back here often for more updates.
This is the MG Gundam RX78 CA.

Spent last Saturday snap fitting the kit.


(more…)
Written by Ken on January 18th, 2007 with 1 comment.
Read more articles on Blog and Model Kit.
I built this kit about 2 or 3 months ago. At that time I was in the process of sourcing for an airbrush and compressor and hence this kit was again hand painted.
All pictures where taken with my trusty Fujifilm Finepix S9500. Click on an image to view a larger version. Enjoy.
(more…)
Written by Ken on January 17th, 2007 with no comments.
Read more articles on Blog and Model Kit.
Ever since I started hand painting my first Gundam, I knew that airbrush was the way to go. Hand painting a Gundam or any other model is a pain and the result is hardly impressive. You can have a look at the Gundam, a 1/144 RX-78 GP02 in this post.
I knew from then that if I wanted to go far with this hobby, I would need to own an airbrush sooner or later. Another thing that one should consider with owning an airbrush is the spray booth. You don’t need one if you have a vast amount of space to do your airbrushing in but if you are like me who lives in a small apartment, then using a spray booth is highly recommended.
Getting a well-made branded spray booth can be expensive and this is on top of the cost of the airbrush and air compressor. In view of this I’ve decided to build my own spray booth. I’ve seen on the Internet how some people make their own spray booths and use those as reference.
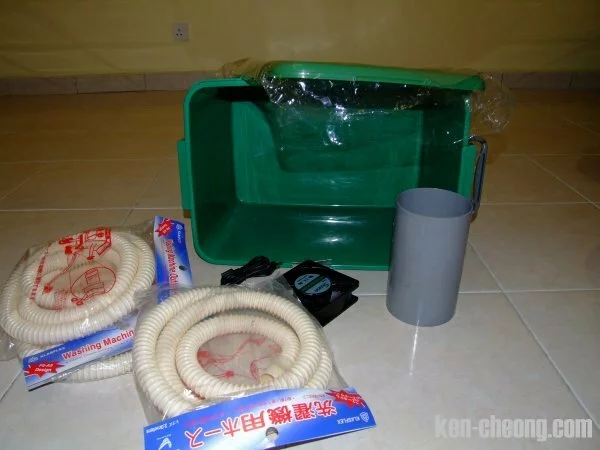
Below shows how I make my own spray booth.
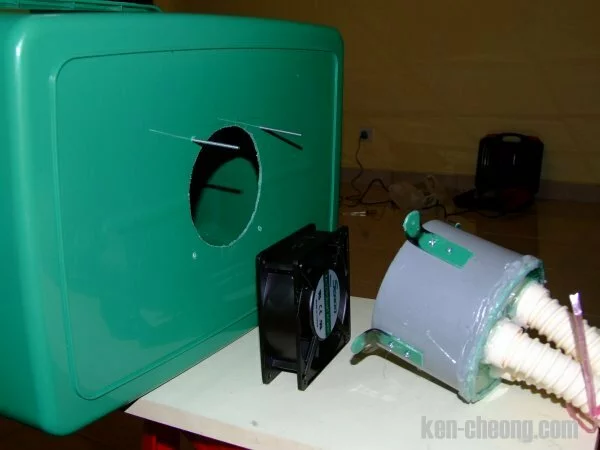
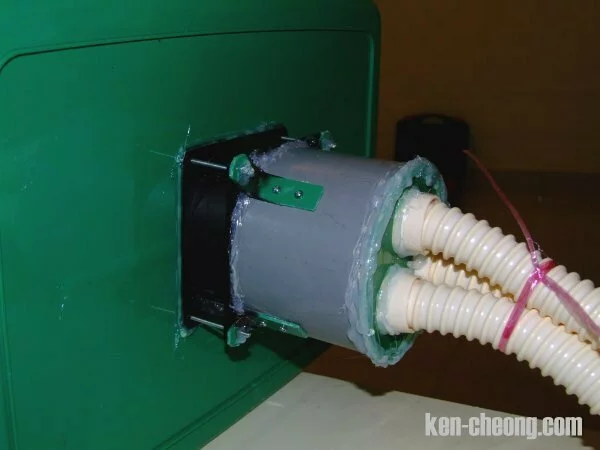
These are the material I used. One plastic box (RM19), an exhaust fan I got from an electronic component shop (RM30), a PVC tube (RM5), some screws (RM3), and three washing machine draining hoses (RM40). The reason I used the draining hoses is because I couldn’t find any bigger hose. Ironically one week after I finish building the spray booth, my brother told me he saw a shop selling the big hose that I was looking for. L I choose a bigger box because it can fit bigger models like a 1/48 plane.
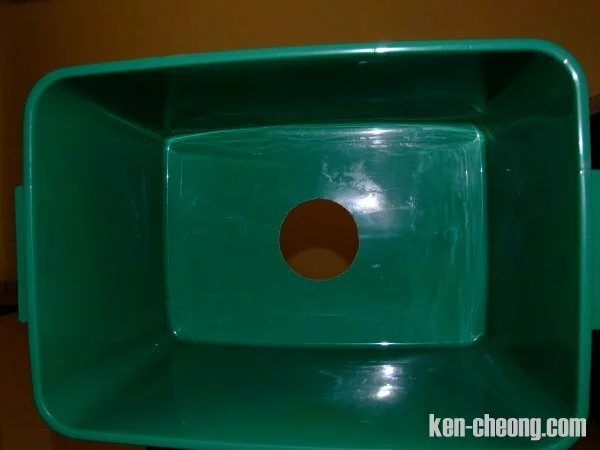
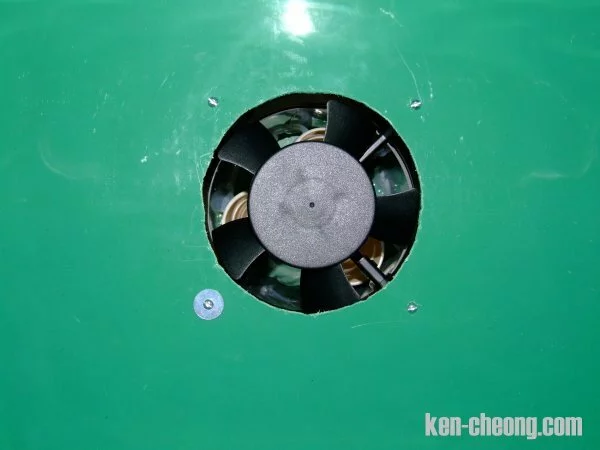
I cut a hole the size of the exhaust fan in the base of the box but first drilling small hose in circle. Then I use a cutter to cut off the plastics between holes. Lastly I use a big, round file to file the edge to smooth. This is how it looks like. You can use a bigger exhaust fan if you like but beware your wig might be sucked into it.
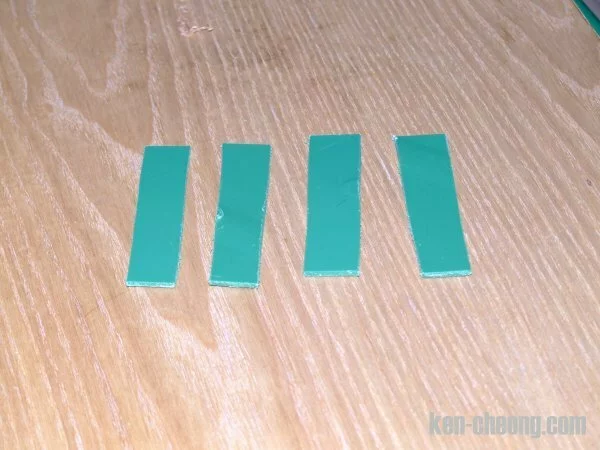
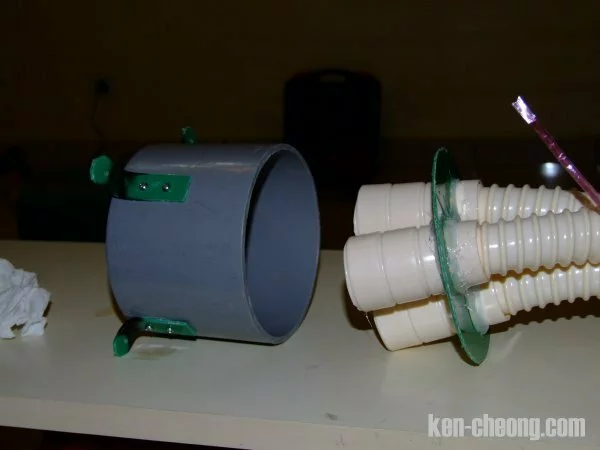
The cut out piece of round plastic is then cut into small rectangular pieces. These pieces were then turned into L shape by heating and bending.
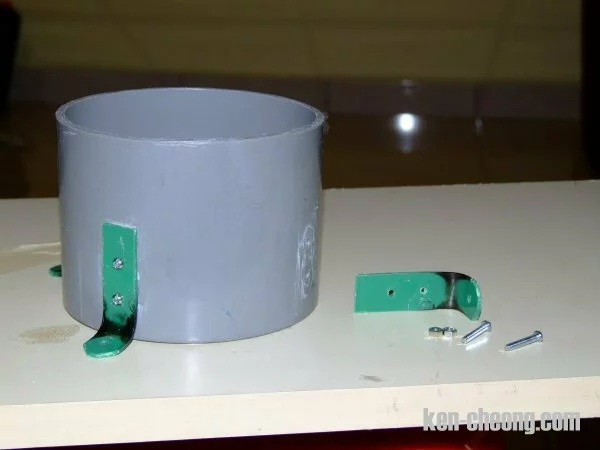
The L shape pieces were then secured onto the PVC tube using screws.
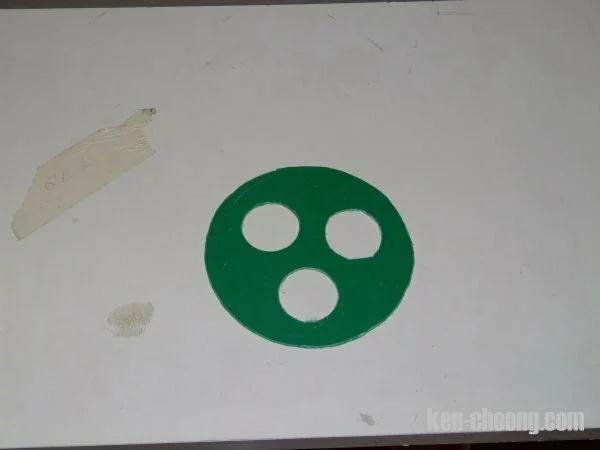
I needed another piece of round plastic as cover for the exhaust side of the tube. I cut another piece of round plastic from the cover of the plastic box using the same method mentioned above. I then cut three holes in the round plastic for the draining hoses.
This is the round plastic with a draining hose in it.
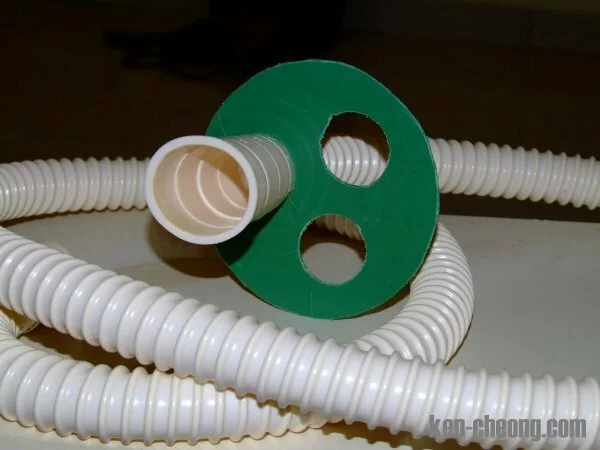
The round plastic will be fixed to the exhaust side of the PVC tube.
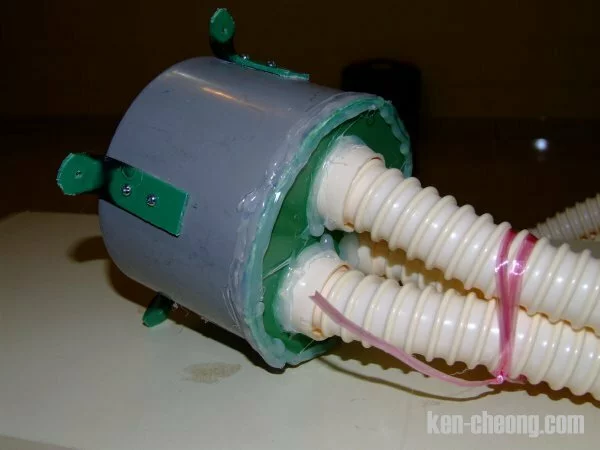
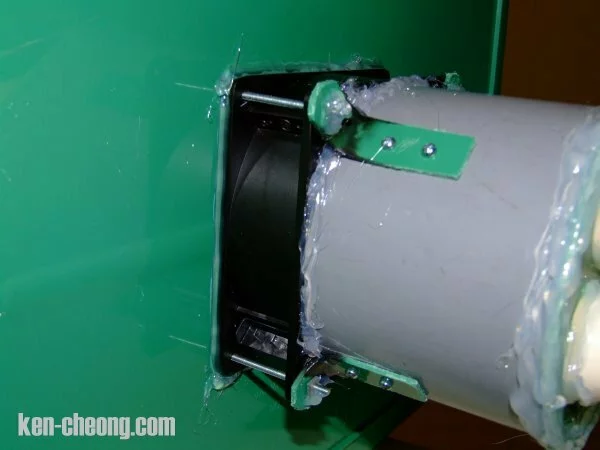
This is how it looks like after being fixed to the PVC tube. The white-transparent-gooey looking stuff is actually glue applied using a glue gun. Glue gun is your friend.
It is now time to but everything together. Notice that I had drilled small holes in the plastic box so that I can put in the long screws to secure everything together.
This is how it looks like after they are all screwed ^^ together.
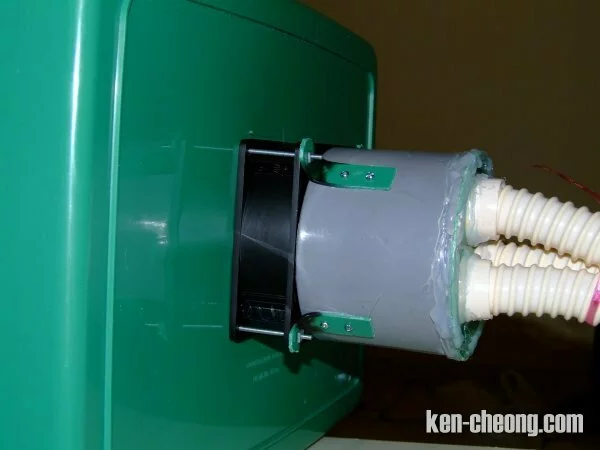
The were small gaps between the box and the exhaust fan where airflow could leaks so once again I applied glue to seal off the gaps. Glue gun is your friend.
A closer look.
A look from the inside. I actually wanted to fit a filter in front of the fan but since using the draining hoses had compromised the airflow, I don’t want to further compromise it with a filter. And so I would use it as it is. To turn it on, simple connect the fan cable to a 240V outlet and turn on the switch.
By the way, I took me just one day to build the spray booth. This is not including the time spent on sourcing for material.
I might update this post later with the usage of the spray booth so check back later if you want to know how well it works.
Update 22/01/2007:
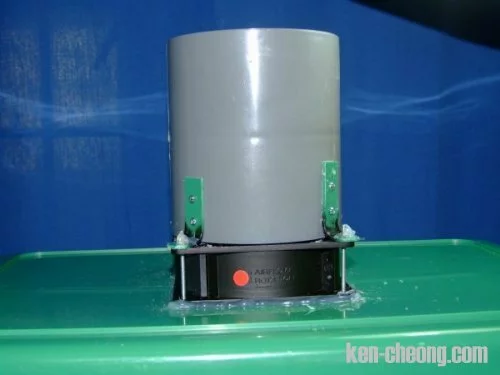
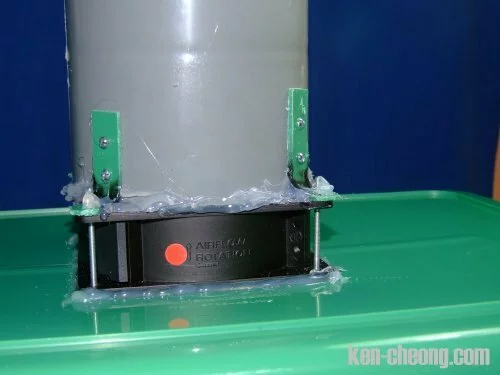
Used my DIY spray booth while painting my HGUC Gogg and found that it was not working as expected. The problem lies with the three drainage hoses. The exhaust fan was too fast and since the three drainage hoses were too small, the airflow was compromised and caused a back flow where air was push back to into the box. To rectify this problem, I bought a new PVC tube and a matching PVC socket.
The diameter of the matching socket is slightly bigger than that of the PVC tube and hence can be attached and detached with minimum efforts.
First I replace the old PVC tube with the new socket.
Once the socket was screwed into place. I apply glue using a glue gun to seal off any leaking gaps. Glue gun is your friend.
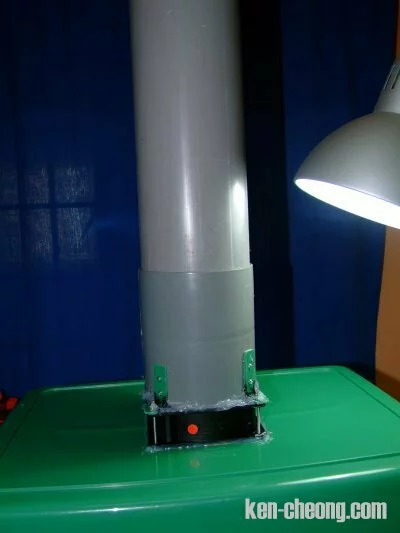
With PVC tube attached.
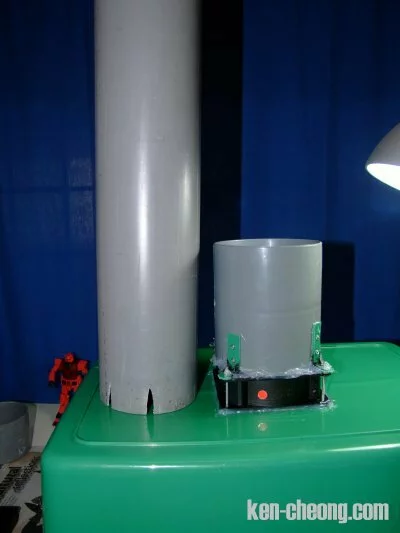
With PVC tube detached.
With this straight through approach the spay booth now works perfectly. When I need to use the spray booth I just attached the PVC tube to the socket and put the other end through the grill and out the window. Another advantage of using this approach is that I can detached the PVC tube so easy storing when not using the spray booth.
Written by Ken on January 11th, 2007 with 2 comments.
Read more articles on Blog and Model Kit.
Got these pictures from an email. The subject of the email was Reebok’s Official Car. I’m not too sure if this really is the official car of Reebok but it does look cool.
Written by Ken on January 9th, 2007 with no comments.
Read more articles on Blog and Cool.